Things are getting busy here, we are coming up to the end of the school year for us here in Australia & then the summer holidays & Christmas. I have been spending a lot of time torching & doing all the photography, photo editing & listing that is involved in having an Etsy shop.
Last time I posted I spoke about putting the molten glass on the mandrel & today we will talk about shaping it using presses.
The most basic ways to shape glass are by using gravity & by using the heat of the flame (with no other counteracting forces, glass flows towards the heat). You can make some shapes like this, but if you want to make lots of bead shapes, the quickest & most efficient way is to use a marver or a press. A marver is simply a flat paddle of graphite that you roll the molten glass on to create shapes like barrels & bicones. You can have handheld marvers or ones that are torch mounted - I have both & each of them is used for a different technique, the handheld one gets used for rolling a bead whereas the torch mounted one I use a lot to tidy the ends of the bead.
Presses on the other hand given an almost infinite array of shapes & what you can make with them is really only limited by your imagination (or rather, the imagination of the person making the presses). Presses are usually made from brass as molten glass won't stick to brass & it is very strong (unlike graphite which is very brittle & breaks easily - ask me how I know, go on, ask LOL).
If you want your press to make a good impression (pun intended!) the most important thing is that the sides meet up exactly in line so that the edges of your beads are sharp & crisp. This has led to the development of 2 main types of presses, the first type have prongs on 2 diagonal corners which you slip into holes on the corresponding corner of the top half of the press & that guides the top of the press into place. In this first picture of the bottom half of the press you can see the groove where the mandrel sits, the hollowed out part of the press where the molten glass is to be shaped & the prongs in the corners. Next to it is a picture of the press when it's closed so you can see how the top fits on it.


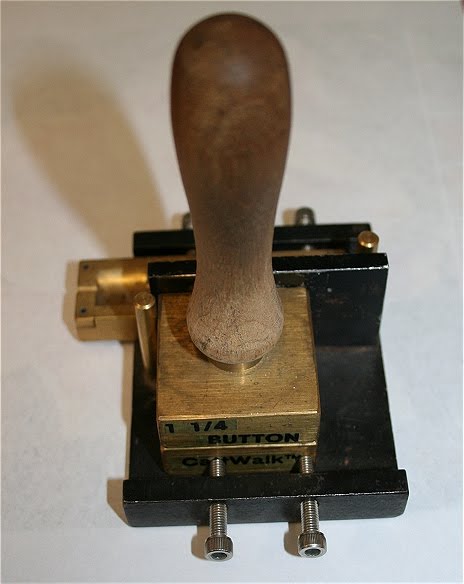
The other type of press has a base section into which you slip the bottom half of the press & the base then guides the top of the press into position as you press down on it. The bottom half of the press is held in place in the base with screws so it can't move around while you are pressing. The type of base that I own has 2 sides to it, one for larger bead presses like the lentils that I make a lot of & a second side for smaller presses which are often the ones used to make sets. Here is a pic of both sides so you can see the difference.


And lastly, here is a pic of the lentil press with the top on it so you can see how it fits nicely on top just by using a little pressure against the base.
Tomorrow we will speak about annealing & thermal cracking, see you then!


2 comments:
Very interesting Robyn, I can just visualise what sort of a mess I could get myself into. As with most crafts, a lot of fiddly work, but well worth it in the end results.
It's easy to get into trouble Marion, I know that from personal experience LOL. Usually things like dropping molten glass on the table (thank god for fireproof cement board!) or on the floor (thank God for metal sheeting too) :) .
Post a Comment